
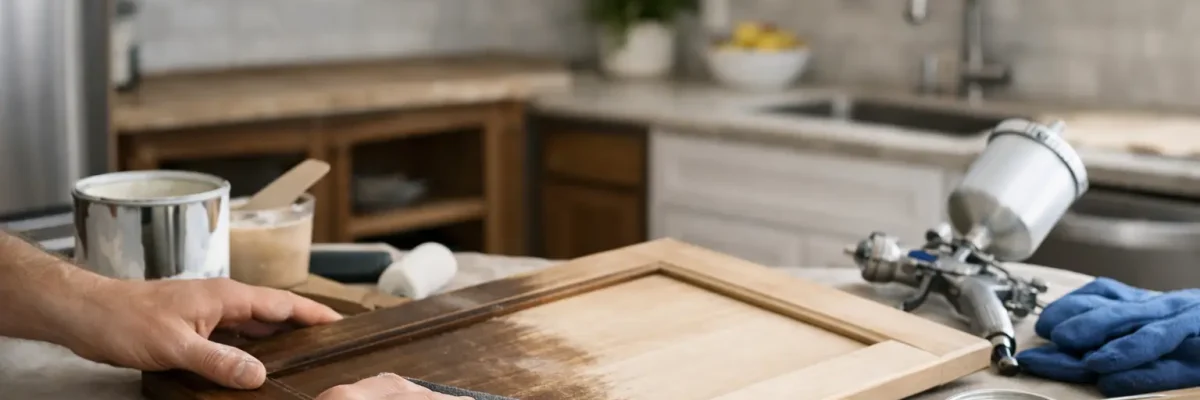
A worn cabinet finish shows up fast in a Phoenix kitchen. Sunlight, heat, cooking grease, and daily use can leave doors looking faded, sticky, chipped, or simply dated long before the cabinets themselves are ready to be replaced. If you’re wondering how to refinish kitchen cabinets, the good news is that solid cabinet boxes and doors can often be brought back to life with the right prep, products, and application methods.
Cabinet refinishing is one of the most cost-effective ways to update a kitchen, but it is also one of the easiest paint projects to get wrong. A good result depends less on the color and more on the surface prep, coating choice, and patience between steps. If you rush the process or use the wrong materials, the finish can fail early around handles, edges, and high-touch areas.
What refinishing actually means
When people ask how to refinish kitchen cabinets, they may be talking about a few different approaches. Sometimes they want to clean, sand, and repaint existing painted cabinets. In other cases, they want to stain natural wood a different tone, or apply a new protective topcoat to cabinets that still have a wood-grain look.
The right process depends on what is already on the surface. Solid wood, MDF, laminate, and thermofoil cabinets all behave differently. Painted wood cabinets are usually the most straightforward to refinish. Laminate or damaged thermofoil can be more complicated, and in some cases replacement doors make more sense than refinishing. That is why the first step is always identifying the cabinet material and current finish before buying products.
Before you start, decide whether your cabinets are good candidates
Refinishing works best when the cabinet structure is sound. If the doors are warped, hinges are pulling loose, water damage has swollen the material, or the finish is peeling because the substrate is failing, a cosmetic update may not hold up well. Cabinets that are basically solid but visually tired are ideal candidates.
It also helps to set realistic expectations. Refinishing can dramatically improve appearance, but it will not fix poor layout, low-quality cabinet construction, or heavy structural wear. If your main goal is a cleaner, brighter, more current look, refinishing can deliver strong value.
How to refinish kitchen cabinets step by step
A durable cabinet finish starts long before primer or paint. The biggest difference between a professional-looking result and a short-lived one is prep.
Remove doors, drawers, and hardware
Take off all doors, drawer fronts, hinges, knobs, pulls, and catches. Label every piece so reassembly goes smoothly. It sounds simple, but skipping this step often leads to uneven coverage, paint bridges around hinges, and a finish that looks rushed.
Set up a clean work area for the doors and drawers away from dust and foot traffic. Horizontal painting is usually easier and produces a smoother result than trying to paint everything in place.
Clean every surface thoroughly
Kitchen cabinets collect more contamination than most homeowners realize. Grease, hand oils, food residue, and cleaning product buildup can all interfere with primer adhesion.
Use a degreasing cleaner designed for prep work, not just a general household wipe-down. Pay extra attention to areas near the stove, around handles, and along lower door edges. Once cleaned, let the surfaces dry fully before sanding.
Sand or degloss the existing finish
The goal here is not always to strip cabinets down to raw wood. In many cases, you just need to remove gloss and create a profile the new coating can bond to. A thorough scuff sanding is often enough for previously painted cabinets in good condition.
If the old finish is failing, chipping, or built up unevenly, more aggressive sanding may be necessary. Repairs should happen at this stage as well. Fill dents, old hardware holes if you’re changing pull locations, and minor surface imperfections with a quality filler, then sand smooth.
Prime with the right bonding primer
Primer matters more on cabinets than on standard walls. Cabinets need a product that bonds tightly and creates a stable base for the topcoat. If you’re covering stained wood, a stain-blocking primer is often the better choice, especially if tannins or old finishes could bleed through.
This is also where shortcuts become visible later. Low-quality primer can lead to peeling around corners and high-touch spots. For kitchens, durability has to come first.
Apply cabinet-grade paint or coating
Not all paints are made for cabinets. Walls can get away with softer finishes because they are not touched constantly. Cabinets need coatings formulated for hardness, adhesion, and cleanability.
A smooth finish typically comes from spraying, but brush-and-roll application can work if done carefully with the right tools and products. The trade-off is time and texture. Spraying usually gives the most factory-like appearance, while brushing and rolling are more accessible for DIY projects but can leave stipple or brush marks if technique slips.
Thin, even coats are better than heavy coats. Allow proper drying and recoat times based on the product, not just the weather or your schedule.
Let the finish cure before heavy use
Dry to the touch does not mean fully cured. Cabinet coatings often need days or even weeks to reach full hardness. During that window, doors can stick, edges can scuff, and hardware installation can leave marks if handled too aggressively.
Be gentle during reassembly and avoid slamming doors or scrubbing freshly finished surfaces. A little patience here protects all the work that came before it.
Common mistakes that ruin cabinet refinishing
The most common failure point is poor cleaning. Paint applied over cooking grease or silicone residue may look fine at first, then start peeling in the exact places that get touched most often.
The second issue is using wall paint on cabinets. Even premium wall paint usually is not designed for cabinet wear. It may scratch, soften, or show fingerprints far too easily.
Humidity, dust, and dry time also matter. In the Phoenix area, dry air can help some products cure well, but heat and airflow can also make coatings flash too fast if conditions are not controlled. That can affect leveling and leave a rougher finish than expected.
Another frequent problem is underestimating prep. Homeowners often picture cabinet refinishing as a painting project, when it is really a surface-restoration project first and a painting project second.
Should you DIY or hire a pro?
That depends on your cabinets, your timeline, and your standard for the final look. If you have a small kitchen, steady hands, and time to work carefully, DIY refinishing can be worthwhile. It is usually best for cabinets that are already painted, in decent condition, and not part of a major schedule-sensitive remodel.
Professional refinishing makes more sense when you want a smoother sprayed finish, your cabinets have damage that needs repair, or you simply do not want your kitchen tied up for longer than necessary. A professional team can also manage masking, dust control, product compatibility, and cure times with fewer surprises.
For homeowners who care about long-term durability, this is where expertise pays off. The right prep system, the right cabinet coatings, and disciplined application can make the difference between a finish that lasts and one that starts failing after one busy season.
Color and finish choices matter too
Refinishing is not only about making cabinets look newer. It is also a chance to improve how the kitchen feels. Lighter colors can help a dark kitchen feel more open. Warm whites, soft greiges, and natural wood tones remain popular because they age well and work with a wide range of counters and flooring.
Finish sheen matters just as much. A satin or low-sheen finish is often a practical middle ground. It is easier to clean than flat paint but less likely to show every fingerprint or surface flaw than a high gloss finish.
If your kitchen gets a lot of direct sunlight, color selection deserves extra thought. Strong light can change how whites, grays, and taupes read throughout the day. Testing samples on-site is always smarter than choosing from a tiny swatch under indoor lighting.
How long do refinished cabinets last?
When done properly, refinished cabinets can look good for years. Longevity depends on surface condition, product quality, and how the kitchen is used. A busy family kitchen with constant cooking and heavy traffic will naturally put more stress on the finish than a lightly used space.
Routine care helps. Use gentle cleaners, wipe spills quickly, and avoid abrasive pads. Most finish damage comes from repeated impact, grease buildup, and harsh cleaning methods rather than ordinary wear alone.
For homeowners in Phoenix and nearby communities, professional cabinet refinishing can be an especially smart investment because replacing a full kitchen is expensive, disruptive, and often unnecessary when the cabinet structure is still solid.
If you’re deciding how to refinish kitchen cabinets, think beyond the weekend-project mindset. Done right, cabinet refinishing is not just a cosmetic touch-up. It is a practical upgrade that can refresh the heart of your home, improve day-to-day enjoyment, and give your kitchen a clean, polished look without starting from scratch.